Step 1
Open the Windows Explorer.
To do this, either enter “explorer” as a search term or press the Win+E keys.
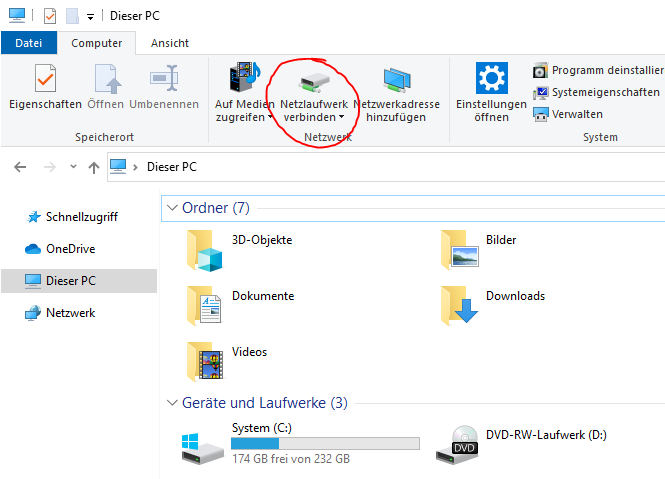
Step 2
Variant (a)
Select This PC in the explorer window and click Computer » Connect to network drive in the menu bar at the top.
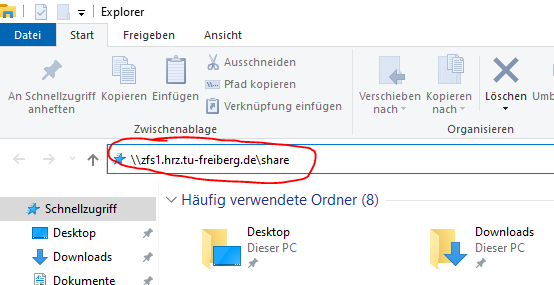
Variant (b)
In the Explorer window, click in the address bar and enter the full path to the share (see Step 3). Or click on the arrow to the right of the address bar and select a network drive address from your history.
You have no other options to choose from for the mount here.
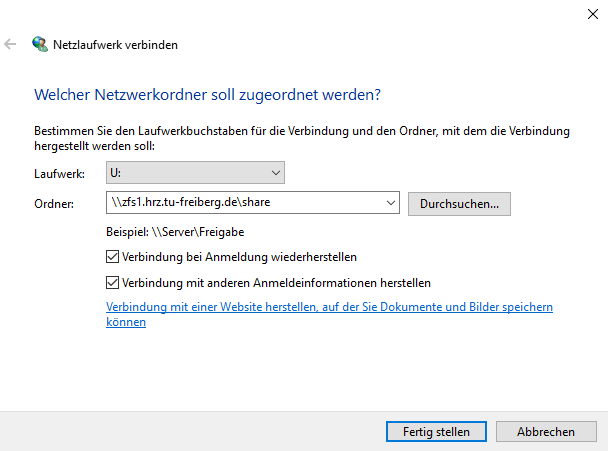
Step 3
In the following dialog box, enter the correct path to your network drive under Folder:
- Network Drive: \\zfs1.hrz.tu-freiberg.de\share (e.g. zuv)
- Home drive: \\zfs1.hrz.tu-freiberg.de\userid (e.g. ab12defg)
- Software drive: \\zfs1.hrz.tu-freiberg.de\software
- Intranet: \\zfs1.hrz.tu-freiberg.de\www\tubaf\intranet\path_to_subdirectory (e.g. tov).
Place a check mark next to Establish connection under different user name.
You can also choose whether this connection should be restored automatically every time you log in or only once.
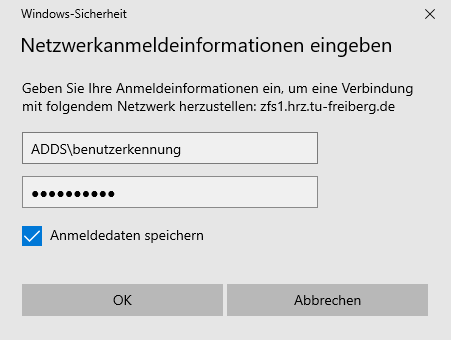
Step 4
Enter your new central password for your user ID.
- Enter domain (ADDS) and login: ADDS\user ID
- Enter password: associated password
You can then open the newly mounted drive in the Explorer window and immediately find yourself in the web folder over which you have been granted write permissions.