Notes
Since the changeover of the cloud, the previous shares as well as the mounted external storages can no longer be used. So far, it is only possible to remount the home directory as external storage.
The home directory is no longer manually mounted as external storage, but is done automatically. To finish configuring it, you need an app password. The following step-by-step instructions describe the procedure.
Project shares are not working again yet. Please create a ticket if you need to mount such a network drive via the cloud again.
Step 1
Log in to the cloud with your new password.
In the file overview, there is a new directory “Central Home”. This is highlighted in pink.
If you have already integrated external storage devices, these will be displayed with a pink background in the file overview, as the configuration no longer works (see step 5).

Step 2
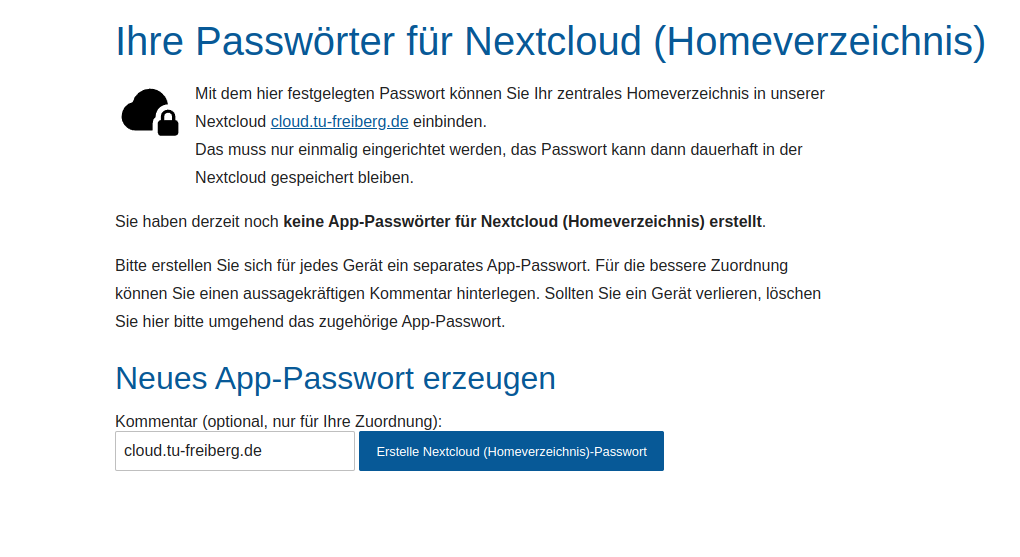
You now need an app password. To do this, log in to the self-service portal with your new password.
Click on the NextCloud (Home Directory) tile and create an app password. You can copy this directly to the clipboard.
Step 3
Click on the new “Central Home” directory in the cloud. You will now be asked to enter the access data.
- Username: Your central user ID (e.g. ab12cdef)
- Password: Your app password you just created (see step 2).
The configuration is now complete.

Step 4
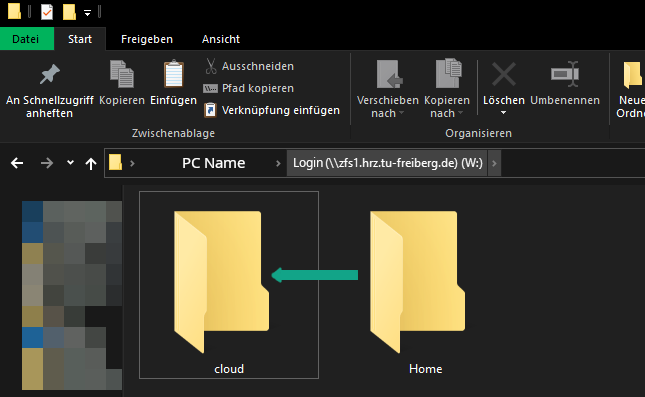
If you have already mounted your home directory as external storage, you can transfer all files and directories to the new share.
To do this, call up the network drive \\zfs1.hrz.tu-freiberg.de\login:
A new directory “cloud” has been created automatically in your home directory if there was none already. This is the new directory for the cloud mount.
Simply move all files from your previous share directory to the new “cloud” directory. You can then access the files again via the cloud.
If your previous share directory is already named this, step 4 is no longer necessary because the synchronization has already been completed.
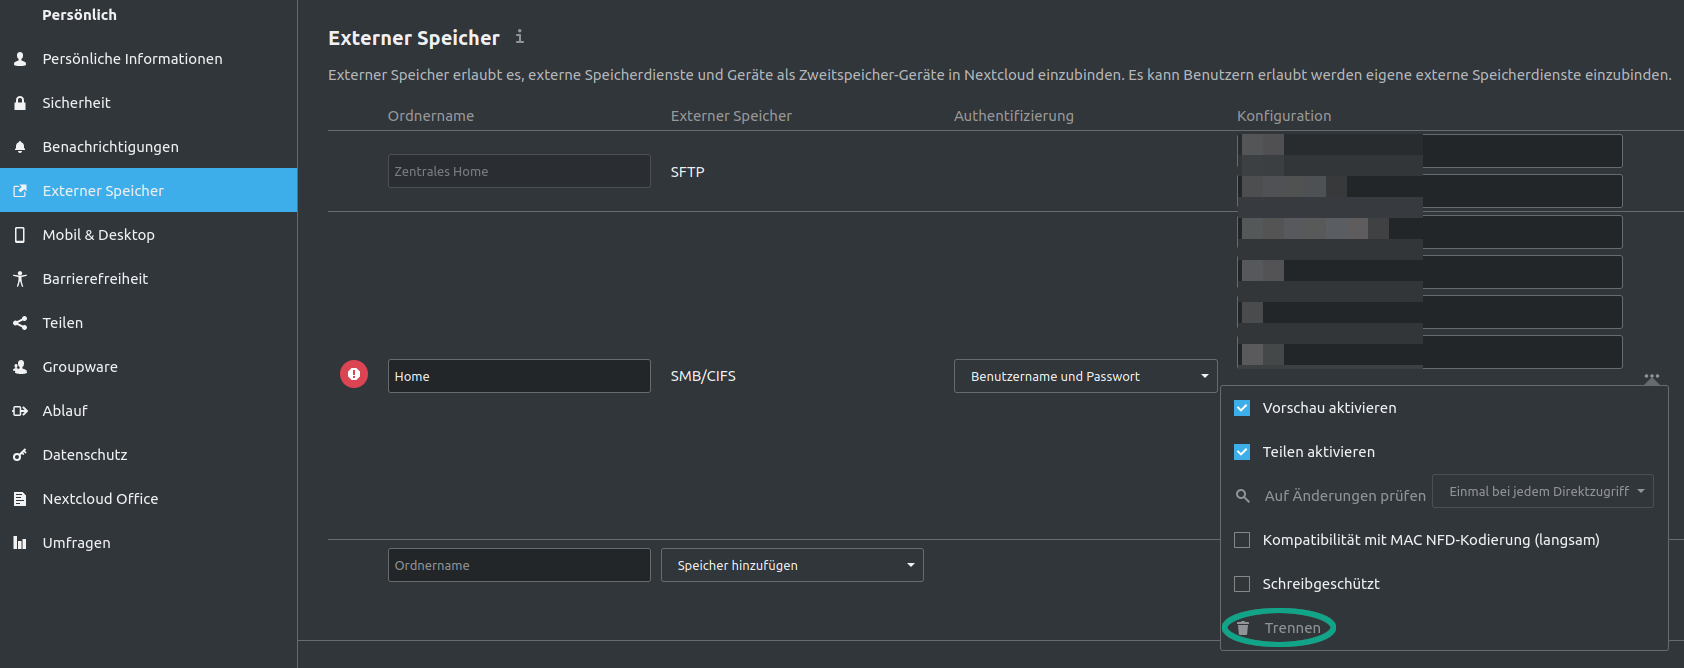
Step 5
If you had already included external storage, you can remove it. To do so, click on your profile in the upper right corner and on “Settings” in the drop-down menu. Select “External storage” on the left. You can now remove all memories with a red symbol in front of them.
To do so, click on the three dots in the respective line on the right and select “Disconnect” in the drop-down menu at the very bottom.